Friday, March 17, 2017

Victorian Women Journal

Hello there,

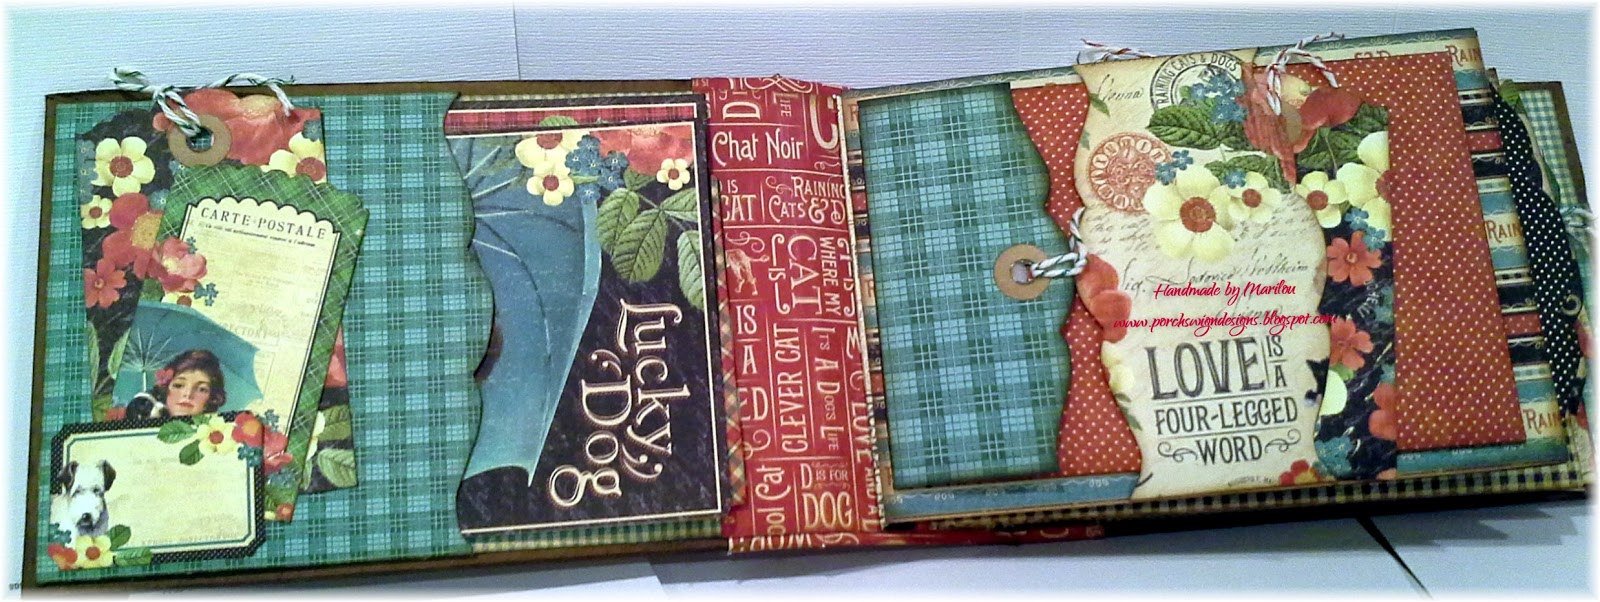
I have another journal to share with you but I'm going to have to share it with you in the form of a video instead of photos, as I usually do.  I forgot to take photos before I mailed it off but managed to grab a screen shot from the video, so will share that here:


I hope you will take the time to watch the video~
 
Since I'm so new at making vids, I hope you will be patient with me while I learn!  lol
Most everything is explained in the video, so let's roll it...


I'm really enjoying making journals and hope that I inspire others to make them as well.  :)

Thank you for stopping by!


⊰⊹✿ Marilou ✿⊹⊱

Wednesday, March 1, 2017

Letters to Rose Junk Journal and an announcement.

I've added a new art form to my crafting and I'm here to share it with you.  I recently discovered Junk Journals and it was love at first sight for me.  I've made four of them now and this is only the second one that I managed to take photos but I actually took it a step further and made a video of it. My first ever video!!  :)
~ Announcement ~


Drum roll, please!

I now have a YouTube channel AND an Etsy Shop!!  WoO HOo!!  This was a huge step for me because I love to craft, so any diversion from that always takes away that time.  But, what must be, must be, so we do what we need to do.  Yes, of course, I'm very excited about all this!!
You can find my YT channel here and my Etsy Shop here.  Thank you for taking a look at them both.

My Letters to Rose Junk Journal  (SOLD)

*click on photos to enlarge them*

I'll share a few photos and if you want to see more,
you can proceed to my YouTube video to view the remainder.  :)

This is the front cover.  It's made two 9" x 12" manila mailing
envelopes (one inside the other) and to add strength and durability,
it's reinforced on the inside using Tyvex.  I altered its size before sealing.

Front Cover

Back cover

After it's constructed and sealed, I used Vintage Photo and Walnut
Ranger Distress Ink to stain the outside.
I used the first coat of Podge Collage to seal and give it a bit of a sheen,
then add the image of Rose and the back cover and the final coat of Podge Collage.

Spine with lace and rosettes

I added some ruffled and glittered tulle to the inside cover
all around the edge for a touch of soft turquoise.

Here are the inside front cover and first page.


This is one of the inside pages, complete with a corner pocket
(which lifts up to reveal a hidden journaling spot), an
embellishment, a tag, and some ephemera.

Most of the journaling pages, bags, etc., are tea-dyed or sprayed
with Lindy Sprays and then baked in my oven.

You can see that the left side of the page has a pocket,
an envelope, and a tag.  The right side has a pocket
that looks somewhat like a woman's blouse.  Items can be placed
in the pocket and behind the pocket.

If you want to see the video of this journal,
please click on my TY channel here.

I simply could not share this journal if I did not give credit to the wonderful artists who create the digital kits I used to make it!

The Letters to Rose Kit is from NectarsCreations on Etsy.  HERE
Some of the extra tags and ephemera I used were from:

TsunamiRose on Etsy.  HERE

ARTYmaze on Etsy.  HERE
The pink lined paper I used was from EphemerasGarden. HERE


It's been a very busy 24 hours here in our home, so I bid you a goodnight!

I hope you return often to see what I'm making!

⊰⊹✿ Marilou ✿⊹⊱

Thursday, February 23, 2017

Once Upon a Time Album

I made this large album as a Christmas gift last year.  I so enjoyed making it because it sent me to look through several boxes of family photographs that I hadn't look through in a very long time and it proved to be quite an emotional roller coast ride for me.  From those boxes, I scanned photos to place in the album and it was truly a labor of love.


I wish I'd taken another photo of the album before I put it in the mail because I did change the ribbon to a simple white one.  You can still, however,
get an idea of it from this photo, although I do not believe that these photos
do the album justice at all.


I used DCWV's "Once Upon a Time" paper stack to make this album and it was perfect for this project.  The album has 6 pages with many flaps and flip-outs.

I wanted the outside to look like an old book and I think I achieved the look.  The paper on the cover depicts the interior of a grand castle.

This next photo shows the first few pages of the album.  Unfortunately, I initially forgot to take photos of the album before I began to add photos.  So, I have blocked out the photos to protect the receiver's privacy, but to still allow you to see the first few pages.

I created a castle door from an image I found online and used it to add to my theme.  This door opened to reveal the castle behind it.  You can see that there are flaps, pockets and inserts on nearly every page in the photos that follow.


Even though the photos are blocked out, I think you can still get a good idea of what the album pages looked like.  The colors of this paper are so rich and some of them have glitter on them.

From this point forward, I had not placed any photographs on the pages so you will be able to see all the pages as I created them and see how beautiful it all goes together.  I actually found it very difficult to put photos in place and cover the paper, but I did.  :)

You can see pockets, inserts, fancy envelopes, flaps, and a waterfall page.


More pages with pockets, envelopes, flaps, belly bands and inserts, as you can see here.

This album, like so many others I've shared, was made using templates from Jenifer Harrison at Jen of Eve Designs.  They are super easy to use and require NO measuring! 

This template set is called "The Ultimate DIY Scrapbook Template" and you can watch a video about it here.  I used the large, but not the largest, size template.

You can find Jennifer on FB here and her Etsy store is here.

I hope you enjoyed what I shared today and that you'll return often to see what I'm up to.

Thanks for stopping by!  <3

⊰⊹✿ Marilou ✿⊹⊱

Sunday, February 5, 2017

Jane Austen Journal

Hello there!

I have a chunky, "girly-to-the-max" journal to share with you.


This vintage journal measures 6" x 9" and is 2" to 3" thick when its "cinched" down with its ribbon-tie closure. This chunky journal weighs more than a pound, has more than 120 pages (counting both sides) and plenty of pockets, tags, envelopes, ephemera, "tuck spots" and loads of journaling space.  I've also tucked in many quotes from Miss Austen's books, so it's very romantic!


Many of the pages are coffee-dyed and/or are sprayed with Glimmer Mist and or Lindy's starburst sprays. I used lace, tulle, ribbon, tiny ribbon flowers, eyelash fibers, paper clips, glassine bags, specialty matt photo paper, parchment paper, card stock, ledger paper, grid paper, tracing paper, etc., to create the pages and elements.
The cover is machine stitched around the edges and is reinforced at the inside spine with a large piece of Tyvek. The cover (including the clip art of the woman) is coated with Ranger Multi Matte Medium. There are two signatures in the hand-sewn binding and the outside of the spine is covered with white “duct tape” (for additional strength) and then covered with two beautiful strips of white muslin flowers.


*Please click on the images to enlarge them*


SOLD  It was a lot of fun to create and it is for sale, so if you're interested, please email me here.  $85, plus shipping.  It would make a perfect Valentine's gift for yourself or someone you love.  :)
 
I've used digital printable kits and images from several Etsy sites so I will share the links to them below.

Dreamzetc here.

TsunamiRose here.

ARTYmaze here. 

Ephemera's Garden here.

Popstock here.


Thanks for stopping by to take a look at what I've been up to.  :)

⊰⊹✿ Marilou ✿⊹⊱

Saturday, January 28, 2017

Southern Charm Vintage Mini Journal/Album

Hello there!

I've got a beautiful and very feminine Journal to share with you today!  It's a printable journal designed by Jennifer at Jenofeve Designs and it was lots of fun to make.

*click on the photos to enlarge them*


The journal is 6 3/8" tall x 4 1/4" wide and has a 1 3/4" spine.  It has 7 signatures with a total of 96 pages, front and back.  The signatures are hand sewn and bound to the covers using
a Coptic stitch.  I coffee stained the card stock that "sandwiches" the pages in the journal and it smells yummy!  The ribbon is Snug Hug seam binding that I dyed with Dr. Ph Martin's Bombay India Ink.


Below is a collage of photos that will show you the front and back covers, as well as the both sides of the album.  You can see the Coptic Stitch I did on the spine of the album.


Here are a few of the pages within the album/journal.  (It can be either one, depending on how you choose to use it.)


The photo on your left shows the inside of the back cover.
The photo on your right is a sampling of the tags and envelopes
you will find withing the album/journal.

You can find Jen of eve Designs here on YouTube.  You can find her Etsy store here.
You can find her here on Facebook.  If you request her to accept your friendship, you will have access to her wonderful freebies. 

Thank you for stopping by to see what I'm making!  Please, come again.


⊰⊹✿ Marilou ✿⊹⊱


Thursday, January 12, 2017

More fun with templates!

Yes, I'm still enjoying making
albums, but this time I added a box.

I used Jennifer Harrison's
(Jen of Eve Designs)
 "Keepsake Box and Mini Album" templates

you can find them here on Etsy.

The templates come with printable base pages,
pockets, flaps, belly bands and tags and are
super easy to
use to create a project using
whatever DP you want to use!


(please click on photos to enlarge them)

I made the large box and album

The album has 3 base pages.

Front of box

 This box is 7 1/8" x 6 3/4" x 2 7/8"
 
Box with lid open,
revealing the mini album inside

Album sitting in front of box lid
The album measures 7 1/8" x 4 1/2" x 2 1/8"

Inside front cover (pocket) and first page.

On left, is a flap which covers most of the
back side of the first page.  On the right, is the
front of the 2nd page of the album.

On the left, you see the flap is now open, revealing
that back side of base page 1.

This is a close-up of the front of base page 2.


Base page 2-B and 3A


On the left is the back of base page 3.
On the right is the inside back cover with a belly band.


I made this album to house photos of our

fur baby, Riley, who is now 2 years old now.  Riley is a toy poodle
who grew to be an oversized Toy.  ;)

This album has plenty mats, tags, and inserts to hold
plenty of our photos of Riley!


You'll find Jennifer on Facebook, here.
You will find her YouTube channel, here.
Thank you for taking the time to check out my blog!

⊰⊹✿ Marilou ✿⊹⊱

Sunday, November 20, 2016

An album made using templates!

I've been having so much fun making
albums lately!  Last month I shared a flip book
I made using templates from Jenofeve Designs.
I've now made several of them.  :)

I purchased "Stack the Page" album templates from Jennifer
so now I've been making albums, too.  She makes it so easy to build and create albums
and I'm thrilled to have found them!!

Link to Jennifer's Etsy Store
and her templates here.


I made my first album with DP from
Graphic 45: By the Sea Collection.
The album measures 6 5/8" tall x 4 7/8" wide.
The spine is 1 1/2" wide.


NOTE:  This album and another now for sale on my blog!


**Please click on photos to enlarge them**

Front cover

To give it some texture, I cut out the image
of the woman and layered her over
the base cover, and then did the same
with the shells.
The cover is sealed with Ranger Multi Mat Medium.

The album has six double-sided pages
( and it contains several pockets, flaps, 
inserts, tags, and booklets.  I left lots of room for
photos and journaling.


Inside cover and first page
The inside cover has a pocket which contains
a booklet with 4 sheets of paper to journal on
and a cut-apart from the collection.  I did some stamping
on the cover of the booklet and on the first page of the booklet.

The first page has a pocket with an envelope
which contains a double tag.

 
Second and third pages

On the left, you see a stamped pocket
which contains an envelope with a small booklet.
The booklet has four pages of paper on which to journal.
There is, also, a cut-apart tag from the collection.

On the right, under that belly band, are 3 small
envelopes, each containing a small insert for
photos or journaling.

There is a tabbed booklet (with paper for journaling)
in the pocket which sits between the third and fourth pages.

Fourth and fifth pages

On the left (page 4), is a flap with an embellished paper clip.
When you open the flap, you will see a cut-apart tag
from the collection and plenty of room for photos.

On the right (page five), you can see a pocket
with a flip tag and in the pocket
is a cut-apart tag from the collection.

Sixth and seventh pages

On the left (page 6), is a blank page for a photo,
if you desire, or to leave as is for the beautiful
images in the paper.

On the right (page 7), I left this blank as well.
I just couldn't cover that beautiful paper!  :)
I did add a flap, however!

Between pages six and seven,
I placed a tabbed booklet (with journaling paper).


Pages Eight and Nine

On page eight, there is a tuck spot with
a cut-apart tag from the collection.

On page nine, you'll see a blank page
with an embellished paperclip.

Pages Ten and Eleven

On page 10 is a pocket containing an envelope
which contains a double tag.  Behind the envelope
is a cut-apart tag from the collection.

On page 11, you can see a belly band holding
two small envelopes and a tabbed booklet
which contains paper for journaling.

 Page Twelve and inside back cover

What you see on the left, is a flap which
has an envelope and tag on it.  Once you open the flap
you see a cut-apart tag from the collection
 The opposite side of the flap has Designer Paper on it.

On the back cover, there is a tabbed booklet
with paper for journaling in it.

Thank you for stopping by to see what I've been making.

I will be back shortly to share another album!

⊰⊹✿ Marilou ✿⊹⊱