I just returned from the wedding of
my Aunt Bettie-Jo and her sweetheart Rick, my new Uncle!!
(Yes! She's 6 years younger than me!)
It was a beautiful outdoor wedding followed by
an indoor reception out in the countryside near Rohnert Park, CA.
Here is a photo of the gorgeous couple after their vows:
I'm sorry I haven't posted for so long, but I've been busy making
photo albums for two weddings that were coming this month.
One of the albums, which I'm going to post today, is my gift
to my Aunt Bettie-Jo and new Uncle Rick
and was a work of love for them.
(This is going to be a long post.)
I fashioned this album from a tutorial I found on YouTube
that was done by Laura from Follow the Paper Trail,
but I can't even begin to compare mine to her work.
She was the inspiration!!
This is the front cover.
(all photos are clickable)
The album covers are constructed using chipboard
which I covered with patterned papers and is 6.5" x 6.5"
The inside album pockets are made from envelopes
which I also covered in patterned papers.
Two photo tags slip into each pocket,
so there is plenty of room for photos and journaling.
The opening clasp is a vintage-looking button I found
at Joann's and loved!! I think it adds a lot
to the sparkle and vintage look.
I added two pins I made using coordinating glass beads.
This is the inside from cover.
First pocket and tag.
This is the back of the first pocket.
It has two over-locking hearts
with the Bride and Grooms names printed on them.
Two tags are tucked inside and there is room on the back
of them for small photos or journaling.
A photo could also be tucked into the pocket.
Pocket two and tags.
This is the back of pocket two.
Several tags, related to love, are tucked into
the little pocket at the bottom of the page. Again,
they can be used for photos or journaling.
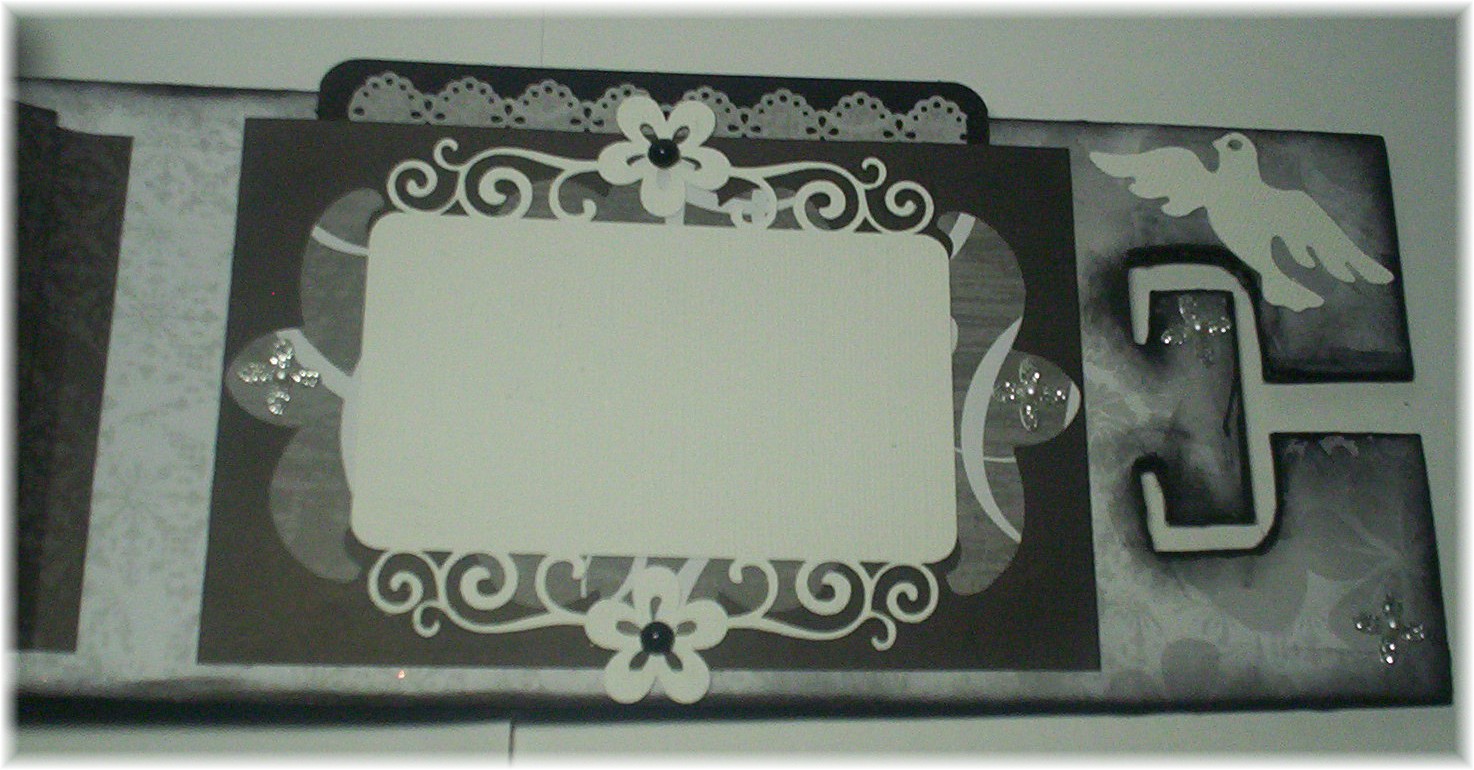
Pocket three.
This is the back of pocket three.
This is a card that opens to a blank inside.
It can be used for another photo or for journaling.
Pocket four.
This is the back of pocket four.
It has several tags with sentiment related to love.
These tags can be used for photos or journaling space.
Pocket five.
This is the back of pocket five.
You can see that there is a journaling spot
and wedding bells that I colored with Copic Markers.
Pocket six.
This is the back of pocket six.
It has a single image of a guest book, and it's made like
a little pocket. Mementos or the edge of a photo could be
positioned there. Small photos could be placed
in the space above the guestbook,
or onto tags, or it could be used for journaling, too.
Inside back cover.
The Bride and Groom both enjoy music and dancing,
so I thought this image was appropriate. They could
add small or cropped photos to this page, or use it for journaling.
Back cover.
Here, you can see a sample of a couple of the albums photo tags
found in each pocket. Both sides are covered with patterned paper,
and they usable for either photos, or journaling, or both!
This is the album binding.
I added ribbon and charms.
The charms are a large heart,
a butterfly, and a cross.
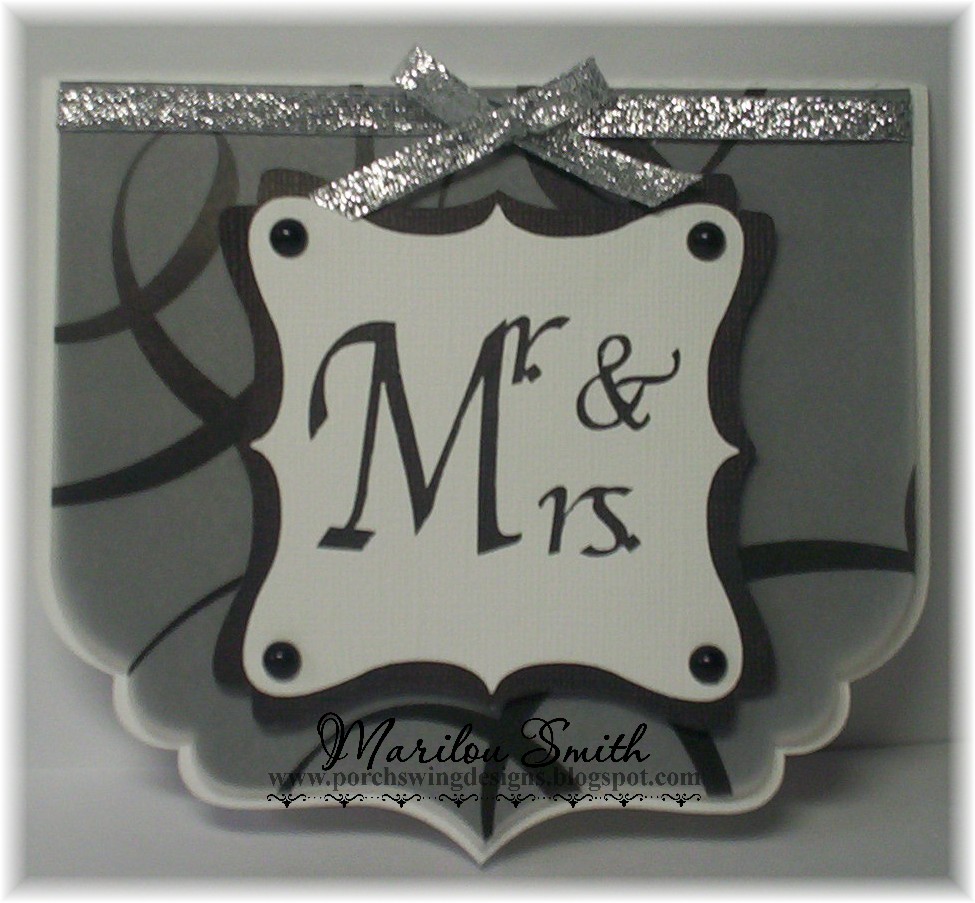
Here's the card I made for them:
The card is 6" x 6" and the image
is from Saturated Canary and is called "Bride."
I see Krista is moving from her Etsy shop to a new location,
so be sure to check back to see what that's all about!!!
I colored the image with my Copic Markers,
and used various punches, die cut shapes, and my Cameo
to provide the card with lots of lace.
Thank you for taking the time to look at all my photos
and descriptions. If you have any questions, please ask!!
I am too tired from my trip to post all the information. :)
╰⊰⊹✿ Marilou ✿⊹⊱╮